Add to Website
Add your Talkr agent to any website so visitors can talk to it by voice or chat with it by text.
How to add it
Add your agent to any website using the Configure Widget dialog in your agent's settings.
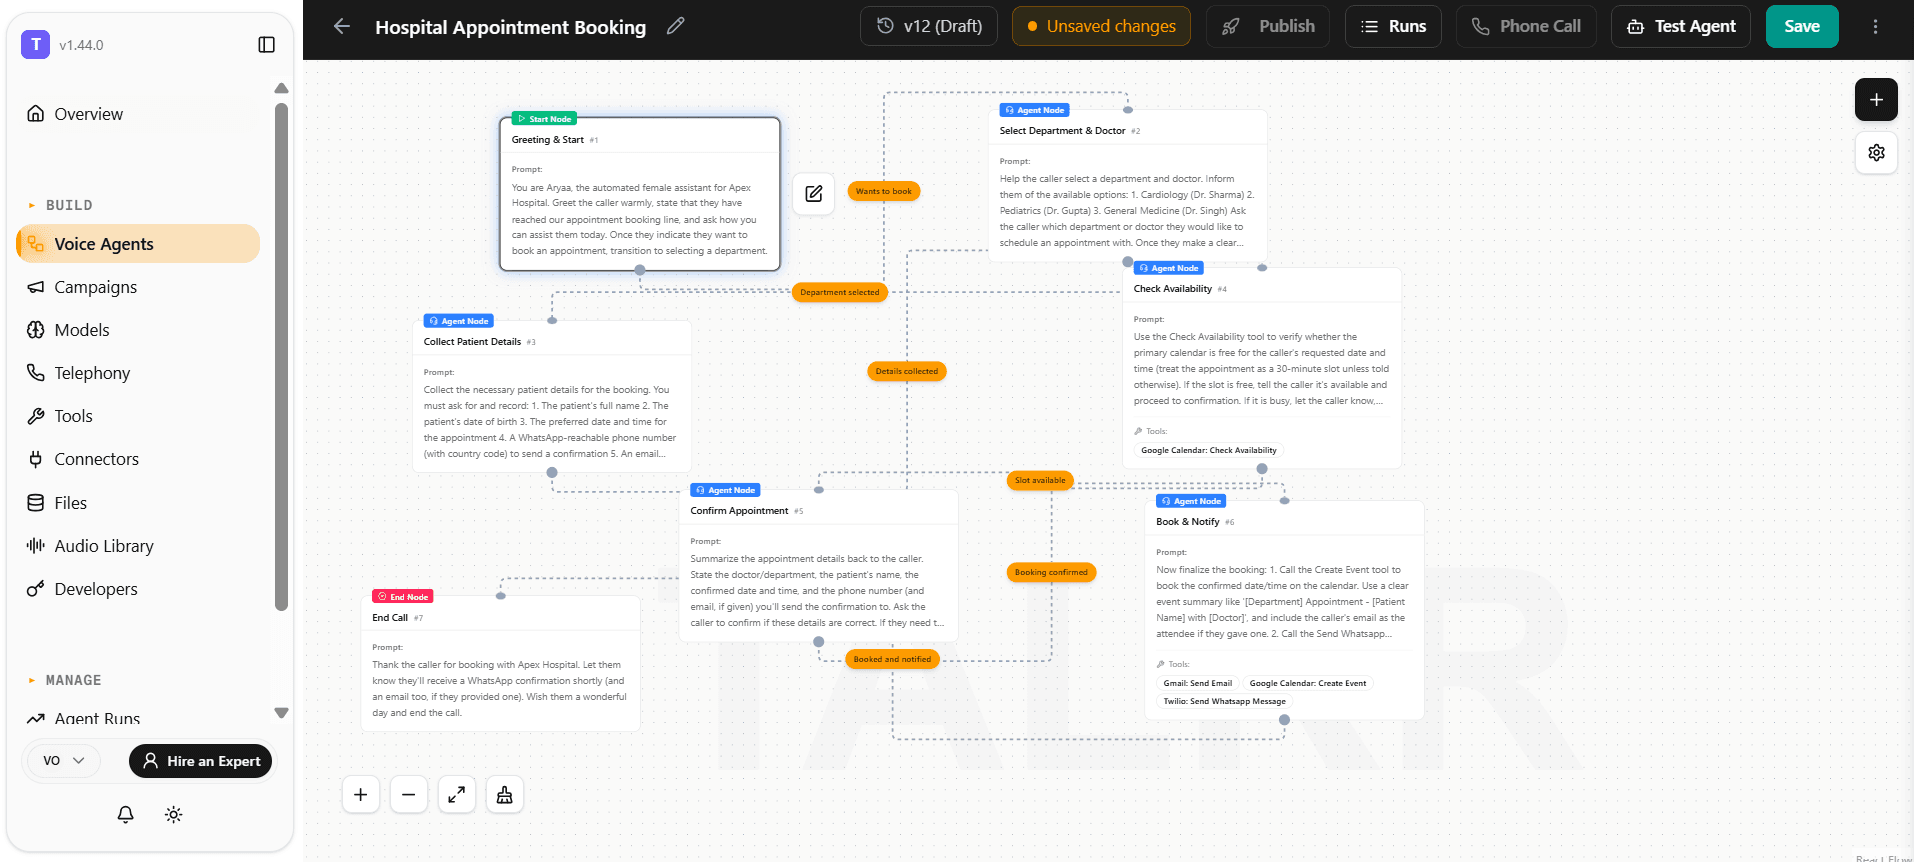
Step 1: Open the agent settings by clicking the gear icon in the top-right of the agent editor.
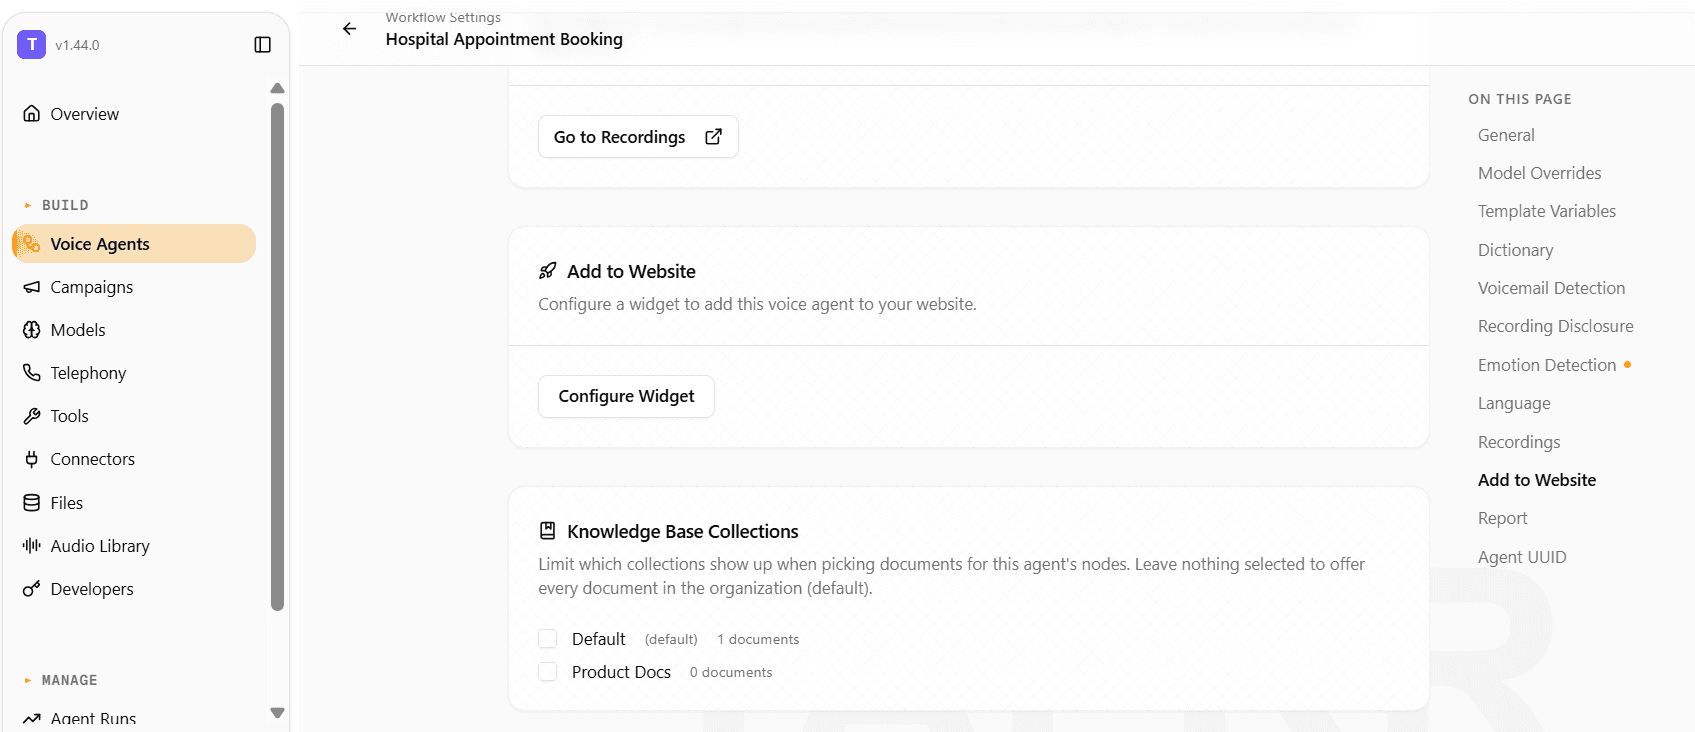
Step 2: Scroll to the Add to Website section and click Configure Widget.
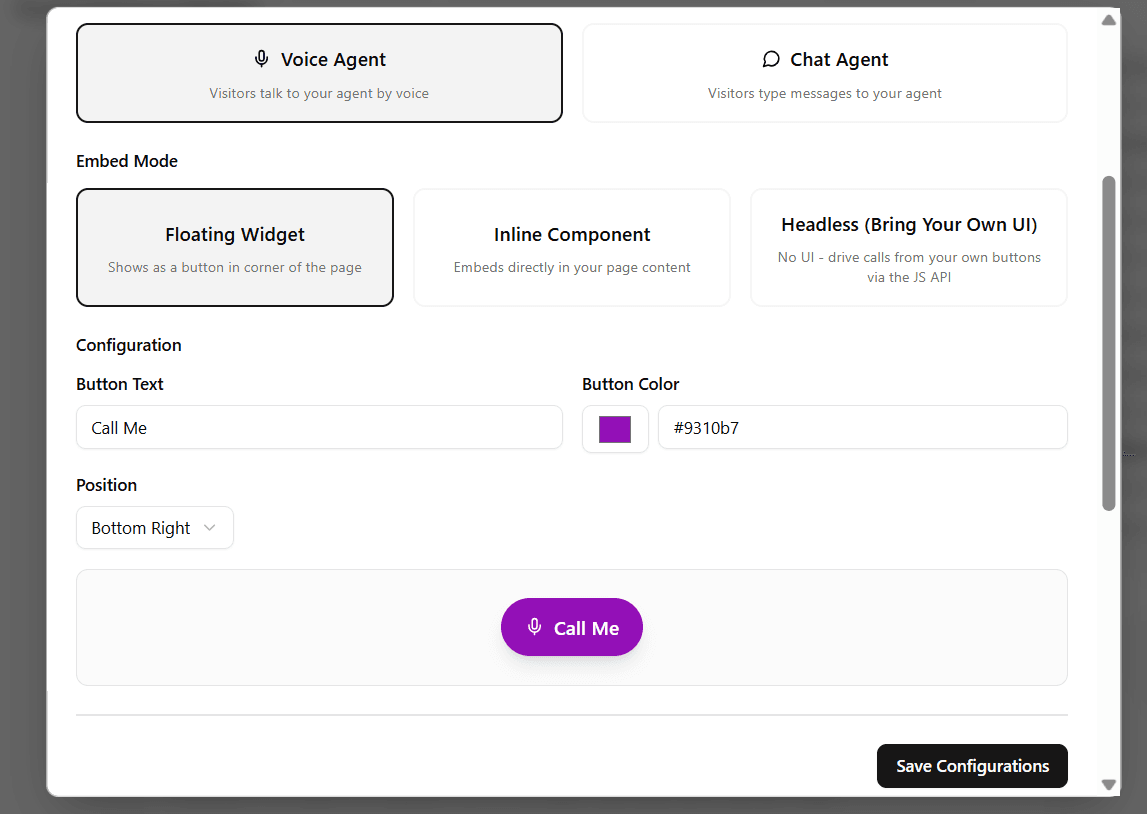
Step 3: Enable embedding, add your website's domain to Allowed Domains, choose a Widget Type (Voice or Chat) and an embed mode (Floating Widget, Inline Component, or Headless (Bring Your Own UI)), customize the button (position, color, text) if applicable, and click Save Configurations.
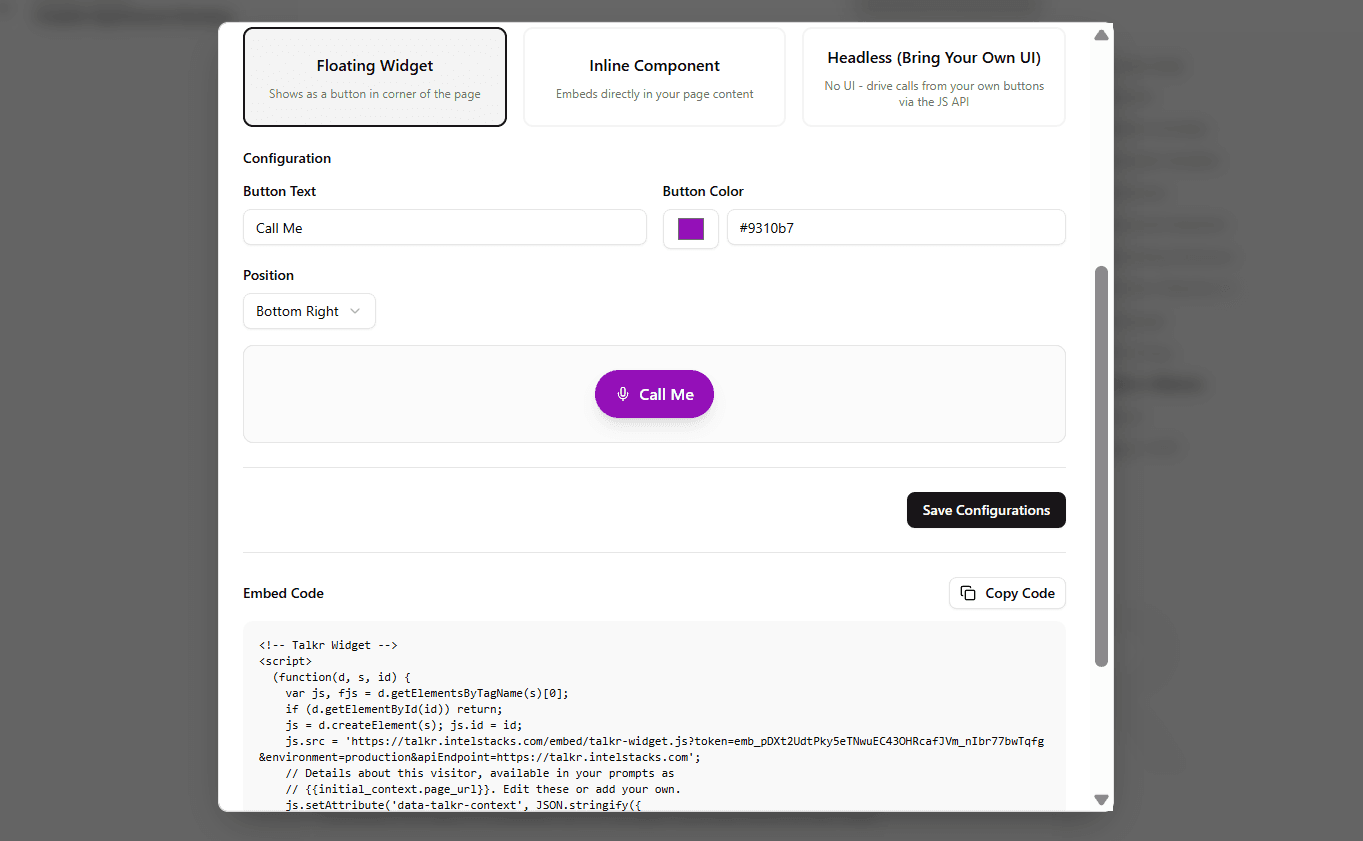
Step 4: Copy the generated embed code and paste it into your web page to test your agent.
Widget types
Each embed widget is either a voice widget or a chat widget — pick the type in the Configure Widget dialog. Both types support all three embed modes.
| Type | How visitors interact |
|---|---|
| Voice | Visitors talk to your agent over a live audio call (WebRTC, microphone required). |
| Chat | Visitors type messages in a chat panel and the agent replies as text. No microphone. |
How chat conversations behave:
- The conversation starts when the visitor opens the chat (clicks the chat button) — the agent greets them first. Page loads alone never start a conversation.
- A chat session lasts up to 1 hour. When it expires, the visitor is offered a Start new chat button, which begins a fresh conversation.
- Reloading the page starts a fresh conversation on the next open — chat history isn't carried across page loads.
- Each conversation counts once toward the embed token's usage limit, same as one voice call.
- Chat conversations appear in your agent's call history with a full transcript.
Embed modes
| Mode | What it renders | When to use |
|---|---|---|
| Floating Widget | A pill-shaped CTA button anchored to a corner of the page. For chat widgets it toggles a chat panel. | You want a turn-key experience that doesn't disturb your existing layout. |
| Inline Component | A panel rendered inside a <div id="talkr-inline-container"> that you place in your page. | You want the agent embedded in a specific section (landing-page hero, support tab, etc.). |
| Headless | No UI. Only the audio/chat pipeline plus a JavaScript API on window.TalkrWidget. | You want full control over the UI — your own buttons, design system, framework state, animations. |
Prerequisites
These apply to all three modes:
- Voice widgets: serve your page over HTTPS or from
http://localhost. Browsers refuse microphone access on plain HTTP origins orfile://. Chat widgets have no microphone requirement, though HTTPS is still recommended. - If you set Allowed Domains in the dashboard, include your test origin (e.g.
localhost) — otherwise the widget's requests are rejected. Leave the list empty to allow all domains. - The embed snippet you copy from the dashboard is a single
<script>tag that loadstalkr-widget.jsasynchronously. The widget auto-initializes once it loads and exposeswindow.TalkrWidget. Code that registers callbacks must wait for the widget to be available.
Pass context to the agent
Your page usually knows something about the visitor — their name, plan, cart value, the article they were reading. Pass it along and your agent can use it from the first word.
Context Key names cannot contain dots, whitespace, pipes, or braces because those characters have structural meaning in template expressions. Invalid entries are dropped without preventing the conversation from starting.
The snippet you copy from the dashboard carries a data-talkr-context attribute — a JSON object of details about the visitor. The snippet is a small bootstrap function: js is the widget <script> element it creates, and the context is attached to that element before it is added to the page. The relevant part of the generated snippet looks like this (keep the generated js.src value, which contains your embed token):
<script>
  (function(d, s, id) {
    var js, fjs = d.getElementsByTagName(s)[0];
    if (d.getElementById(id)) return;
    js = d.createElement(s);
    js.id = id;
    js.src = '<dashboard-generated widget URL>';
    js.setAttribute('data-talkr-context', JSON.stringify({
      page_url: window.location.href,
      today: new Date().toISOString().slice(0, 10)
    }));
    js.async = true;
    fjs.parentNode.insertBefore(js, fjs);
  }(document, 'script', 'talkr-widget'));
</script>
Because it's built in JavaScript at page load, you can put anything your page knows in it — a logged-in customer's name, their plan, cart contents. Replace the object inside JSON.stringify(...) in the generated snippet, for example:
{
  customer_name: currentUser.firstName,
  plan: currentUser.plan,
  cart: { items: cart.length, total: cart.total }
}
Each key is then available in any node prompt as {{initial_context.<name>}}:
Greet {{initial_context.customer_name | there}} and mention their {{initial_context.plan}} plan.Values can be strings, numbers, booleans, or nested objects. This works for voice and chat widgets alike, and the values are recorded on the conversation so you can see what the agent was given.
Update context after the page loads
The attribute is fixed at page load, which doesn't fit a single-page app — the visitor logs in, changes route, or fills a cart long after the snippet ran. For that, call setContext():
window.TalkrWidget.setContext({
  customer_name: user.firstName,
  plan: user.plan
});
Each call merges into the context already collected, so you can add details as they arrive and re-send a name to correct it. getContext() returns the current set.
Context is read when a conversation starts, so setContext() applies to the next conversation — calling it mid-call or mid-chat doesn't change the one in progress (the widget logs a console warning if you do). For chat widgets, "next" includes the fresh conversation started by Start new chat after a session expires.
The widget script loads asynchronously, so window.TalkrWidget may not exist yet when your app's code first runs. Call setContext() from an event that fires after load — a window.load listener, or a user action like clicking your own "Chat with us" button. See Lifecycle callbacks for the same timing rule.
Use whichever fits: data-talkr-context for what the page knows at render, setContext() for what it learns later. They merge, and setContext() wins on a repeated name.
Context comes from the page, so a visitor can both read it and change it before it reaches your agent. Never pass secrets, and don't let it gate what the agent will do or disclose — treat plan: "pro" as a hint for phrasing, not proof of entitlement. For data the agent must trust, pass an opaque id like customer_id and let Talkr fetch the real details from your API with Pre-Call Data Fetch.
Limits, applied per conversation: up to 50 variables, 64 characters per name, 2000 characters per value, and 8 KB in total. Anything past a limit is dropped and the conversation still starts. The names provider and runtime_configuration are reserved and ignored.
Floating Widget
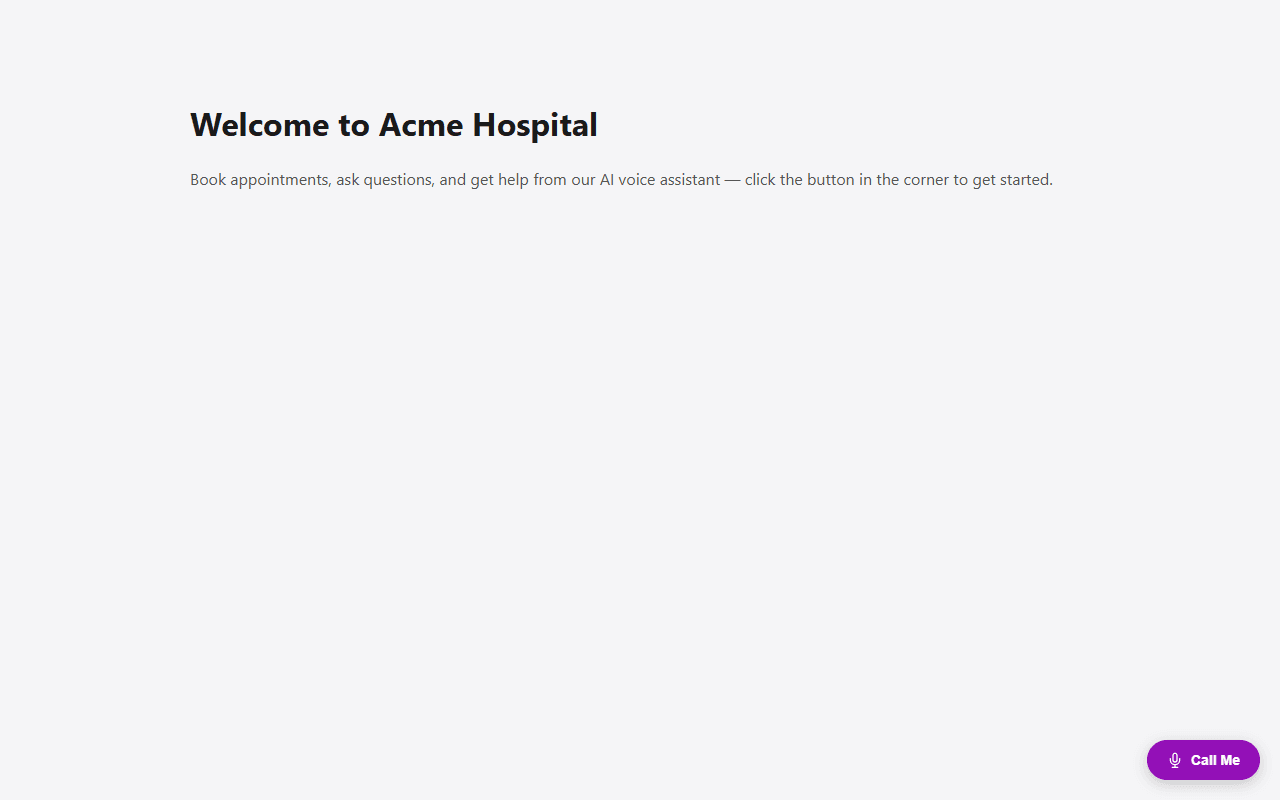
Renders a pill-shaped button anchored to a corner of the page.
- Voice: clicking the button (microphone icon + text) starts a call; clicking again ends it. The button auto-updates its label and color across the call lifecycle: configured text → "Connecting…" → "End Call" → "Retry" on failure.
- Chat: clicking the button (chat icon + text) opens a chat panel anchored to the same corner; the agent greets the visitor and the conversation happens in the panel. Clicking the button (or the panel's ×) closes the panel without ending the conversation — reopening shows the same transcript.
Configure Button Text, Button Color, and Position (top/bottom + left/right) from the dashboard.
The host page writes no JavaScript — pasting the embed snippet is the entire integration. If you want to subscribe to call lifecycle events (e.g. analytics), see Lifecycle callbacks below
Inline Component
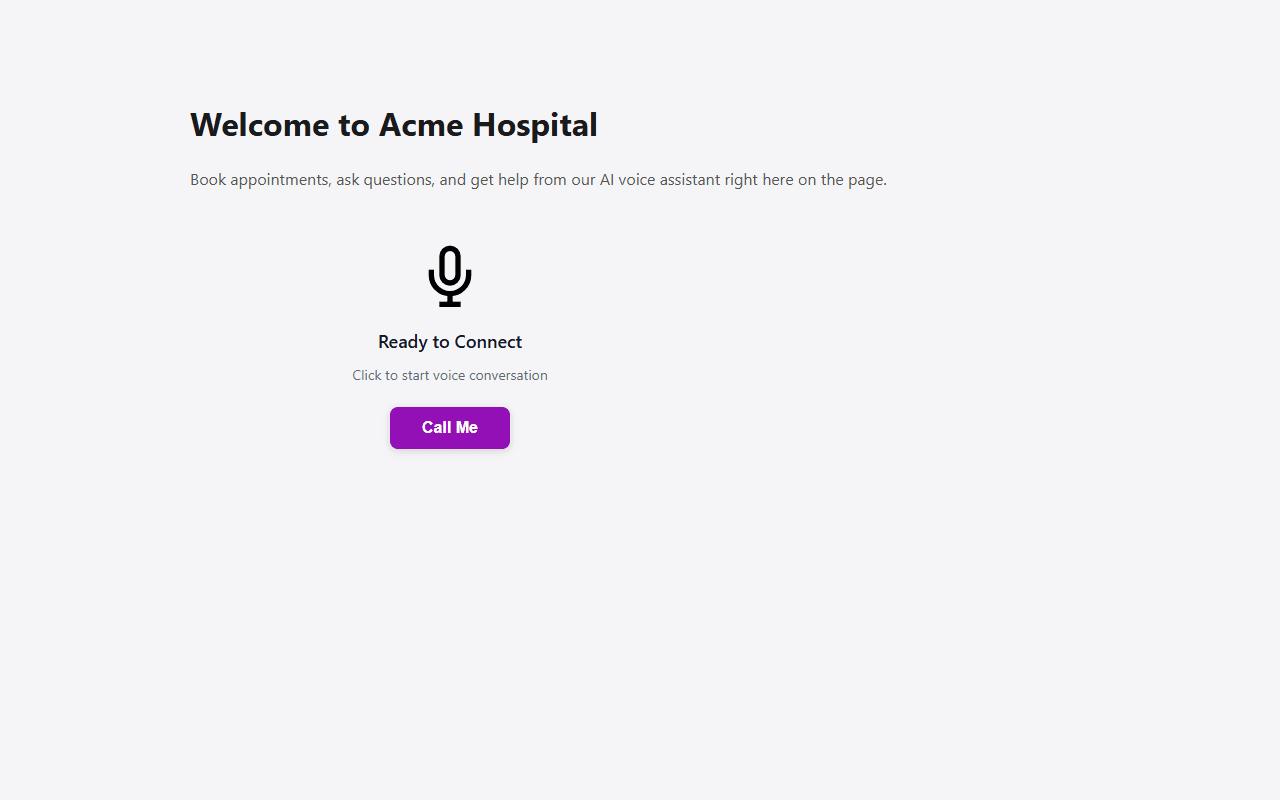
Renders a panel inside a <div> you place in your page.
- Voice: a status panel (status icon + status text + CTA button). Status changes update the panel in place.
- Chat: a call-to-action screen first; clicking the button replaces it with a chat panel that fills the container. No extra JavaScript is needed.
Configure Button Text, Button Color, and Call to Action Text from the dashboard.
Plain HTML
Place a container <div> where you want the widget to render. The widget auto-attaches to it.
<!-- Paste the talkr embed snippet from the dashboard somewhere on the page -->
<div id="talkr-inline-container"></div>
React
Because React mounts after the widget script may have already loaded, integrate via initInline on first mount and refresh on remount. Poll for window.TalkrWidget to handle the async script load.
import { useEffect } from 'react';

declare global {
  interface Window {
    TalkrWidget?: {
      initInline: (options: { container: HTMLElement }) => void;
      refresh: () => void;
      getState: () => { isInitialized: boolean };
    };
  }
}

export function Assistant() {
  useEffect(() => {
    let retries = 0;
    const tryInit = () => {
      const container = document.getElementById('talkr-inline-container');
      if (window.TalkrWidget && container) {
        const { isInitialized } = window.TalkrWidget.getState();
        if (isInitialized) window.TalkrWidget.refresh();
        else window.TalkrWidget.initInline({ container });
      } else if (retries++ < 50) {
        setTimeout(tryInit, 100);
      }
    };
    tryInit();
  }, []);

  return <div id="talkr-inline-container" />;
}
Headless Mode
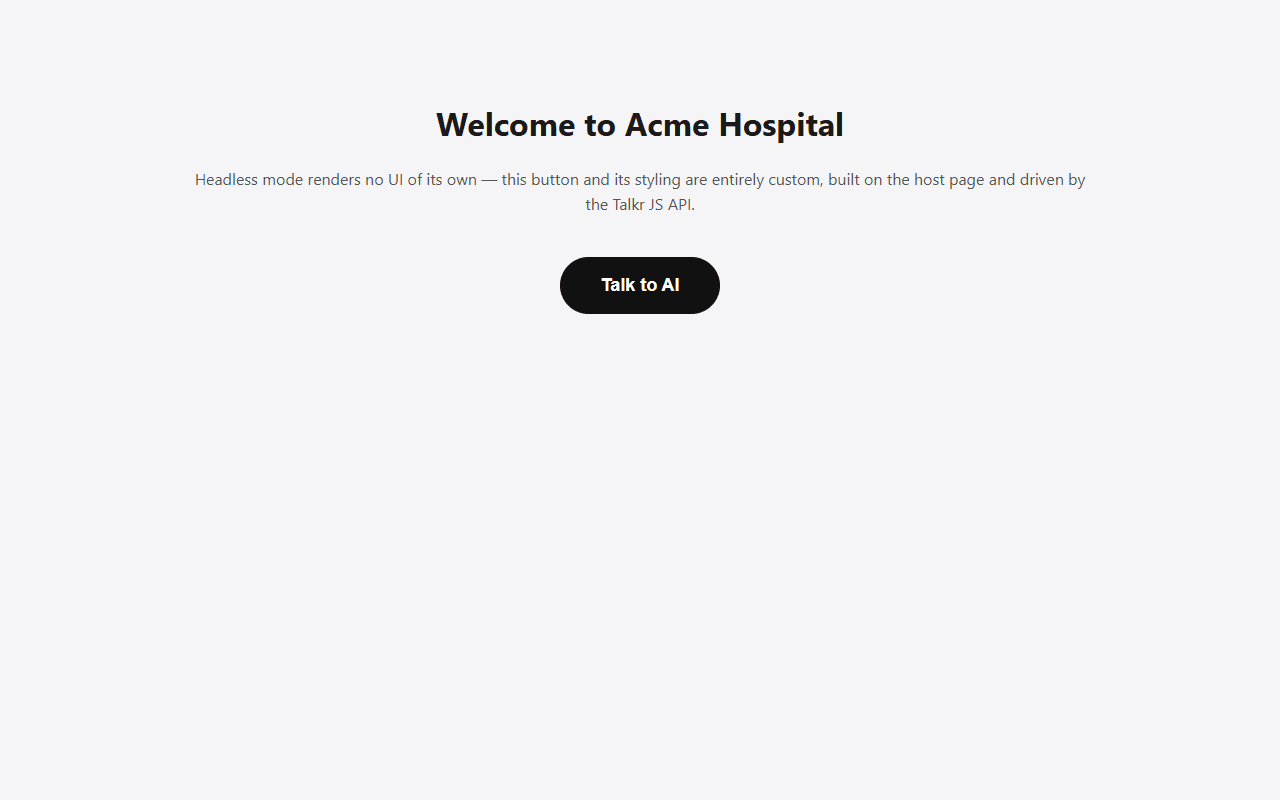
In Headless mode the widget injects no UI of its own. You render whatever buttons, banners, or chat interfaces you want, and drive the agent through the JavaScript API.
JavaScript API (voice widgets)
| Method / Callback | Description |
|---|---|
window.TalkrWidget.start() | Begin a voice call. Must be called from inside a user-gesture handler (e.g. click) so the browser grants microphone access. |
window.TalkrWidget.end() | End the active call. |
window.TalkrWidget.onCallStart(cb) | Fires when start() is invoked (status connecting). No payload. |
window.TalkrWidget.onCallConnected(cb) | Fires when the WebRTC connection is established. Payload: { agentId, workflowRunId, token }. |
window.TalkrWidget.onCallDisconnected(cb) | Fires only if the call had connected, when teardown runs. Payload: { agentId, workflowRunId, token, durationSeconds }. |
window.TalkrWidget.onCallEnd(cb) | Fires whenever the call session is torn down (including failed-to-connect attempts). No payload. |
window.TalkrWidget.onStatusChange(cb) | Fires on every status change. Callback receives (status, text, subtext). Status values: idle, connecting, connected, failed. |
window.TalkrWidget.onError(cb) | Fires on errors (mic permission denied, server error, etc.). Callback receives an Error object. |
window.TalkrWidget.setContext(vars) | Merge visitor context for the next call — see Pass context to the agent. Works in every embed mode, not just headless. |
All on* setters are single-listener — calling the same one again replaces the previous handler.
JavaScript API (chat widgets)
| Method / Callback | Description |
|---|---|
window.TalkrWidget.startChat() | Start a conversation. The agent's greeting arrives via onMessage. |
window.TalkrWidget.sendMessage(text) | Send a visitor message. Returns a Promise that resolves with the updated transcript (array of turns), or null if the message couldn't be delivered. |
window.TalkrWidget.getMessages() | Current transcript as an array of turns: { id, status, user_message, assistant_message }, each message being { text, created_at }. |
window.TalkrWidget.onMessage(cb) | Fires once per new agent reply. Callback receives (text, turn). |
window.TalkrWidget.onChatStateChange(cb) | Fires on every chat state change. States: idle, starting, ready, waiting (agent is replying), ended, expired, error. |
window.TalkrWidget.onError(cb) | Fires on errors. Callback receives an Error object. |
window.TalkrWidget.setContext(vars) | Merge visitor context for the next conversation — see Pass context to the agent. Works in every embed mode, not just headless. |
In chat mode start() aliases startChat() and end() is a no-op teardown (chat sessions need none), so generic snippets keep working. Sends are serialized — sendMessage while a reply is pending (waiting) resolves to null.
<button id="open-chat">Chat with us</button>
<div id="transcript"></div>
<input id="chat-input" /><button id="send-btn">Send</button>

<script>
  window.addEventListener('load', () => {
    window.TalkrWidget.onMessage((text) => {
      const p = document.createElement('p');
      p.textContent = 'Agent: ' + text;
      document.getElementById('transcript').appendChild(p);
    });

    document.getElementById('open-chat').addEventListener('click', () => {
      window.TalkrWidget.startChat();
    });

    document.getElementById('send-btn').addEventListener('click', async () => {
      const input = document.getElementById('chat-input');
      const p = document.createElement('p');
      p.textContent = 'You: ' + input.value;
      document.getElementById('transcript').appendChild(p);
      await window.TalkrWidget.sendMessage(input.value);
      input.value = '';
    });
  });
</script>
About timing. The widget script loads asynchronously, so window.TalkrWidget may not exist at the moment your inline <script> first runs. The examples below assume window.TalkrWidget is already available when registration runs. To guarantee that:
- Vanilla JS: wrap your registration code in
window.addEventListener('load', () => { /* register here */ }). - React: inside
useEffect, register immediately ifdocument.readyState === 'complete', otherwise add a one-timewindow.loadlistener that registers on fire. - Click handlers that call
start()/end()don't need a guard — by the time a user clicks, the widget has long since loaded.
Vanilla JS
<button id="talk-btn">Talk to AI</button>

<script>
  let callStatus = 'idle';
  const btn = document.getElementById('talk-btn');

  function render() {
    btn.textContent =
      callStatus === 'connected' ? 'End Call'
      : callStatus === 'connecting' ? 'Connecting…'
      : callStatus === 'failed' ? 'Retry'
      : 'Talk to AI';
  }

  window.TalkrWidget.onStatusChange((status) => {
    callStatus = status;
    render();
  });

  window.TalkrWidget.onError((err) => {
    console.error('Talkr error:', err.message);
  });

  btn.addEventListener('click', () => {
    if (callStatus === 'connected' || callStatus === 'connecting') {
      window.TalkrWidget.end();
    } else {
      window.TalkrWidget.start();
    }
  });
</script>
React + TypeScript
import { useEffect, useState } from 'react';

type CallStatus = 'idle' | 'connecting' | 'connected' | 'failed';

declare global {
  interface Window {
    TalkrWidget: {
      start: () => void;
      end: () => void;
      onStatusChange: (cb: (status: CallStatus, text?: string, subtext?: string) => void) => void;
      onError: (cb: (err: Error) => void) => void;
    };
  }
}

export function TalkButton() {
  const [status, setStatus] = useState<CallStatus>('idle');

  useEffect(() => {
    window.TalkrWidget.onStatusChange((s) => setStatus(s));
    window.TalkrWidget.onError((err) => console.error('Talkr error:', err.message));
  }, []);

  const isLive = status === 'connected' || status === 'connecting';
  const label = { idle: 'Talk to AI', connecting: 'Connecting…', connected: 'End Call', failed: 'Retry' }[status];

  return (
    <button onClick={() => (isLive ? window.TalkrWidget.end() : window.TalkrWidget.start())}>
      {label}
    </button>
  );
}
start() must run inside a real user-gesture handler (click, touchend, etc.). Browsers refuse to grant microphone access to scripts that request it outside of one — calling start() from a setTimeout or on page load will fail with a permission error.
Lifecycle callbacks (all modes)
The on* callbacks in the Headless JavaScript API work in all three embed modes, not just Headless. Use them for analytics or to trigger UI in the host page even when the widget is rendering its own UI (Floating or Inline). The call callbacks (onCall*) fire for voice widgets; for chat widgets use onMessage and onChatStateChange the same way.
window.TalkrWidget.onCallConnected(({ agentId, workflowRunId }) => {
  analytics.track('voice_call_started', { agentId, workflowRunId });
});

window.TalkrWidget.onCallDisconnected(({ workflowRunId, durationSeconds }) => {
  analytics.track('voice_call_ended', { workflowRunId, durationSeconds });
});
onCallConnected and onCallDisconnected only fire when the call actually establishes a media connection — failed-to-connect attempts (e.g. denied mic, network failure) don't trigger them, so analytics stay clean.